Integrate with Klaviyo
Klaviyo is a popular email marketing and automation platform designed which provides tools and features that enable businesses to create targeted email campaigns, automate marketing processes, and analyze customer data to drive sales and engagement.
Integrate LAI Product Reviews with Klaviyo
Step 1: Installation
Please assure to install 2 apps:
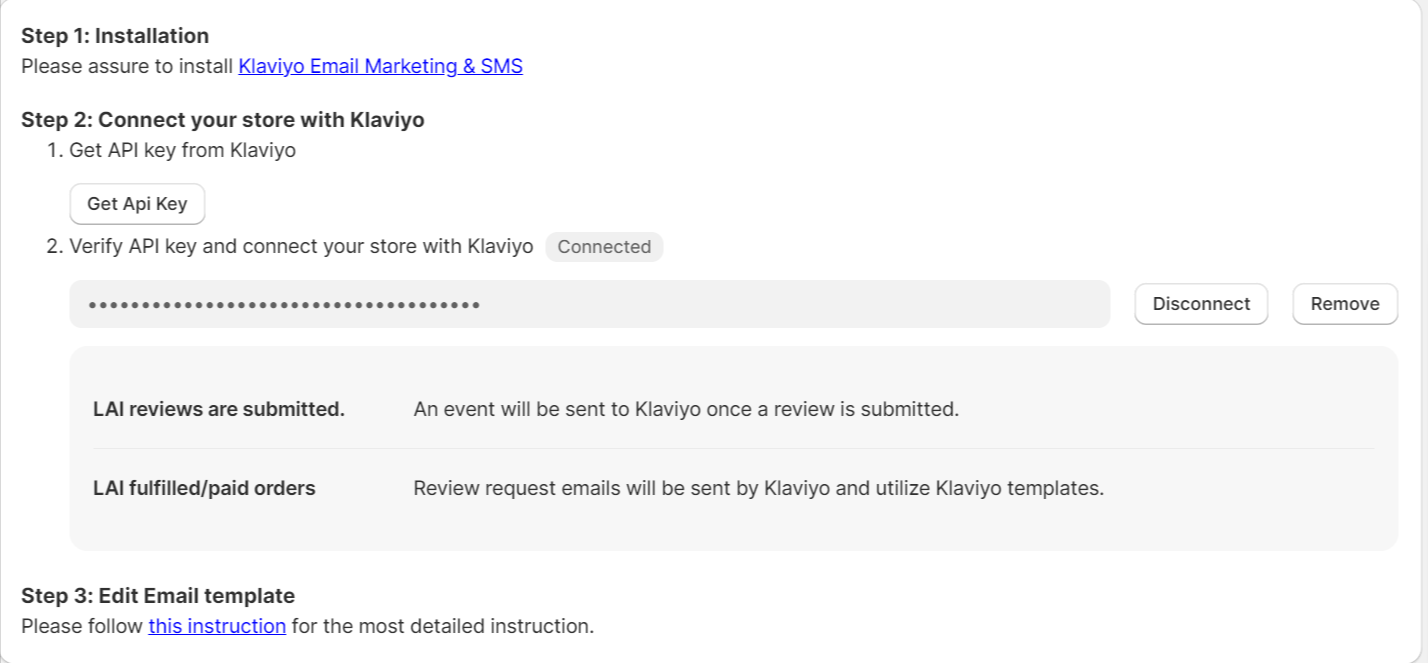
Step 2: Klaviyo API key verification
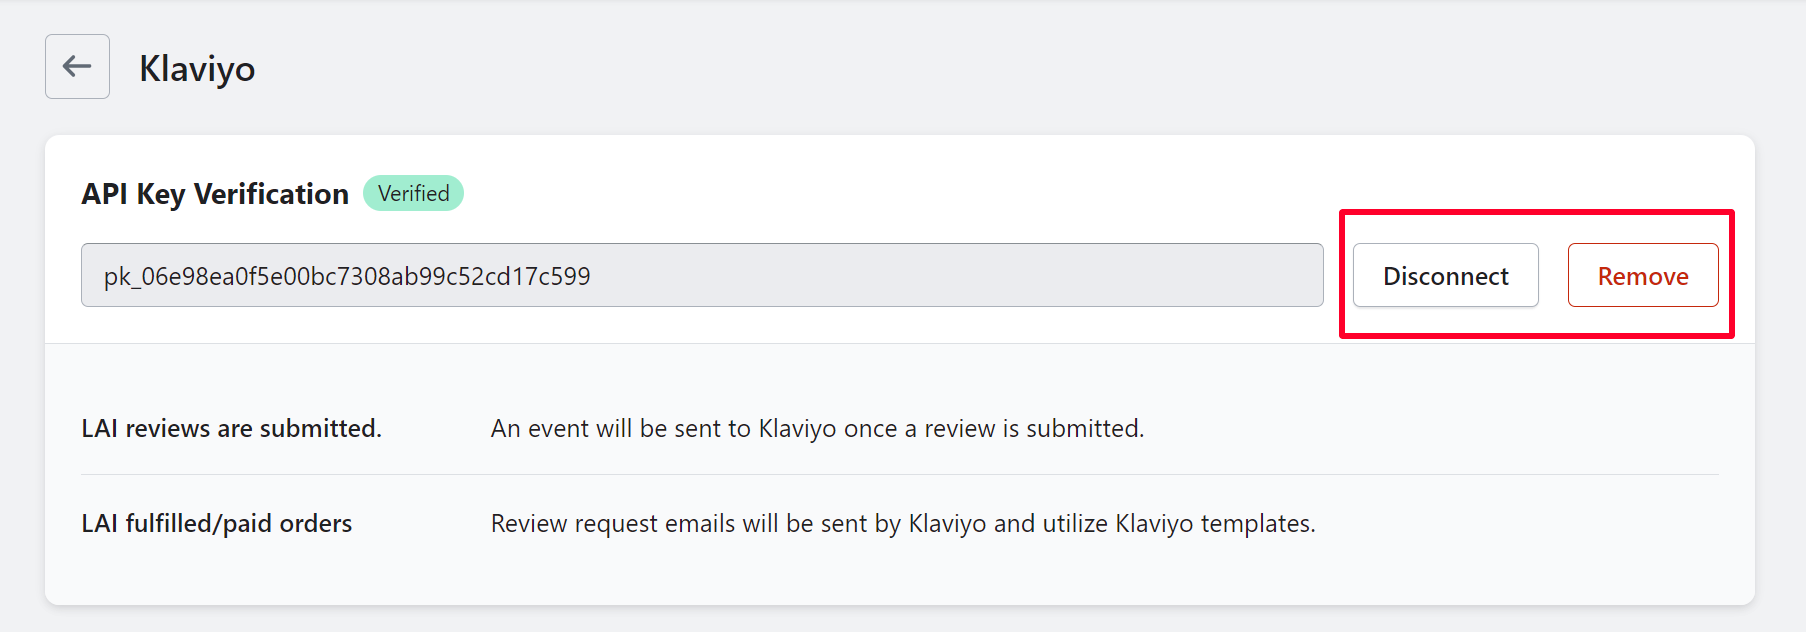
- Please go to Klaviyo admin site > click on Settings > select API Keys.
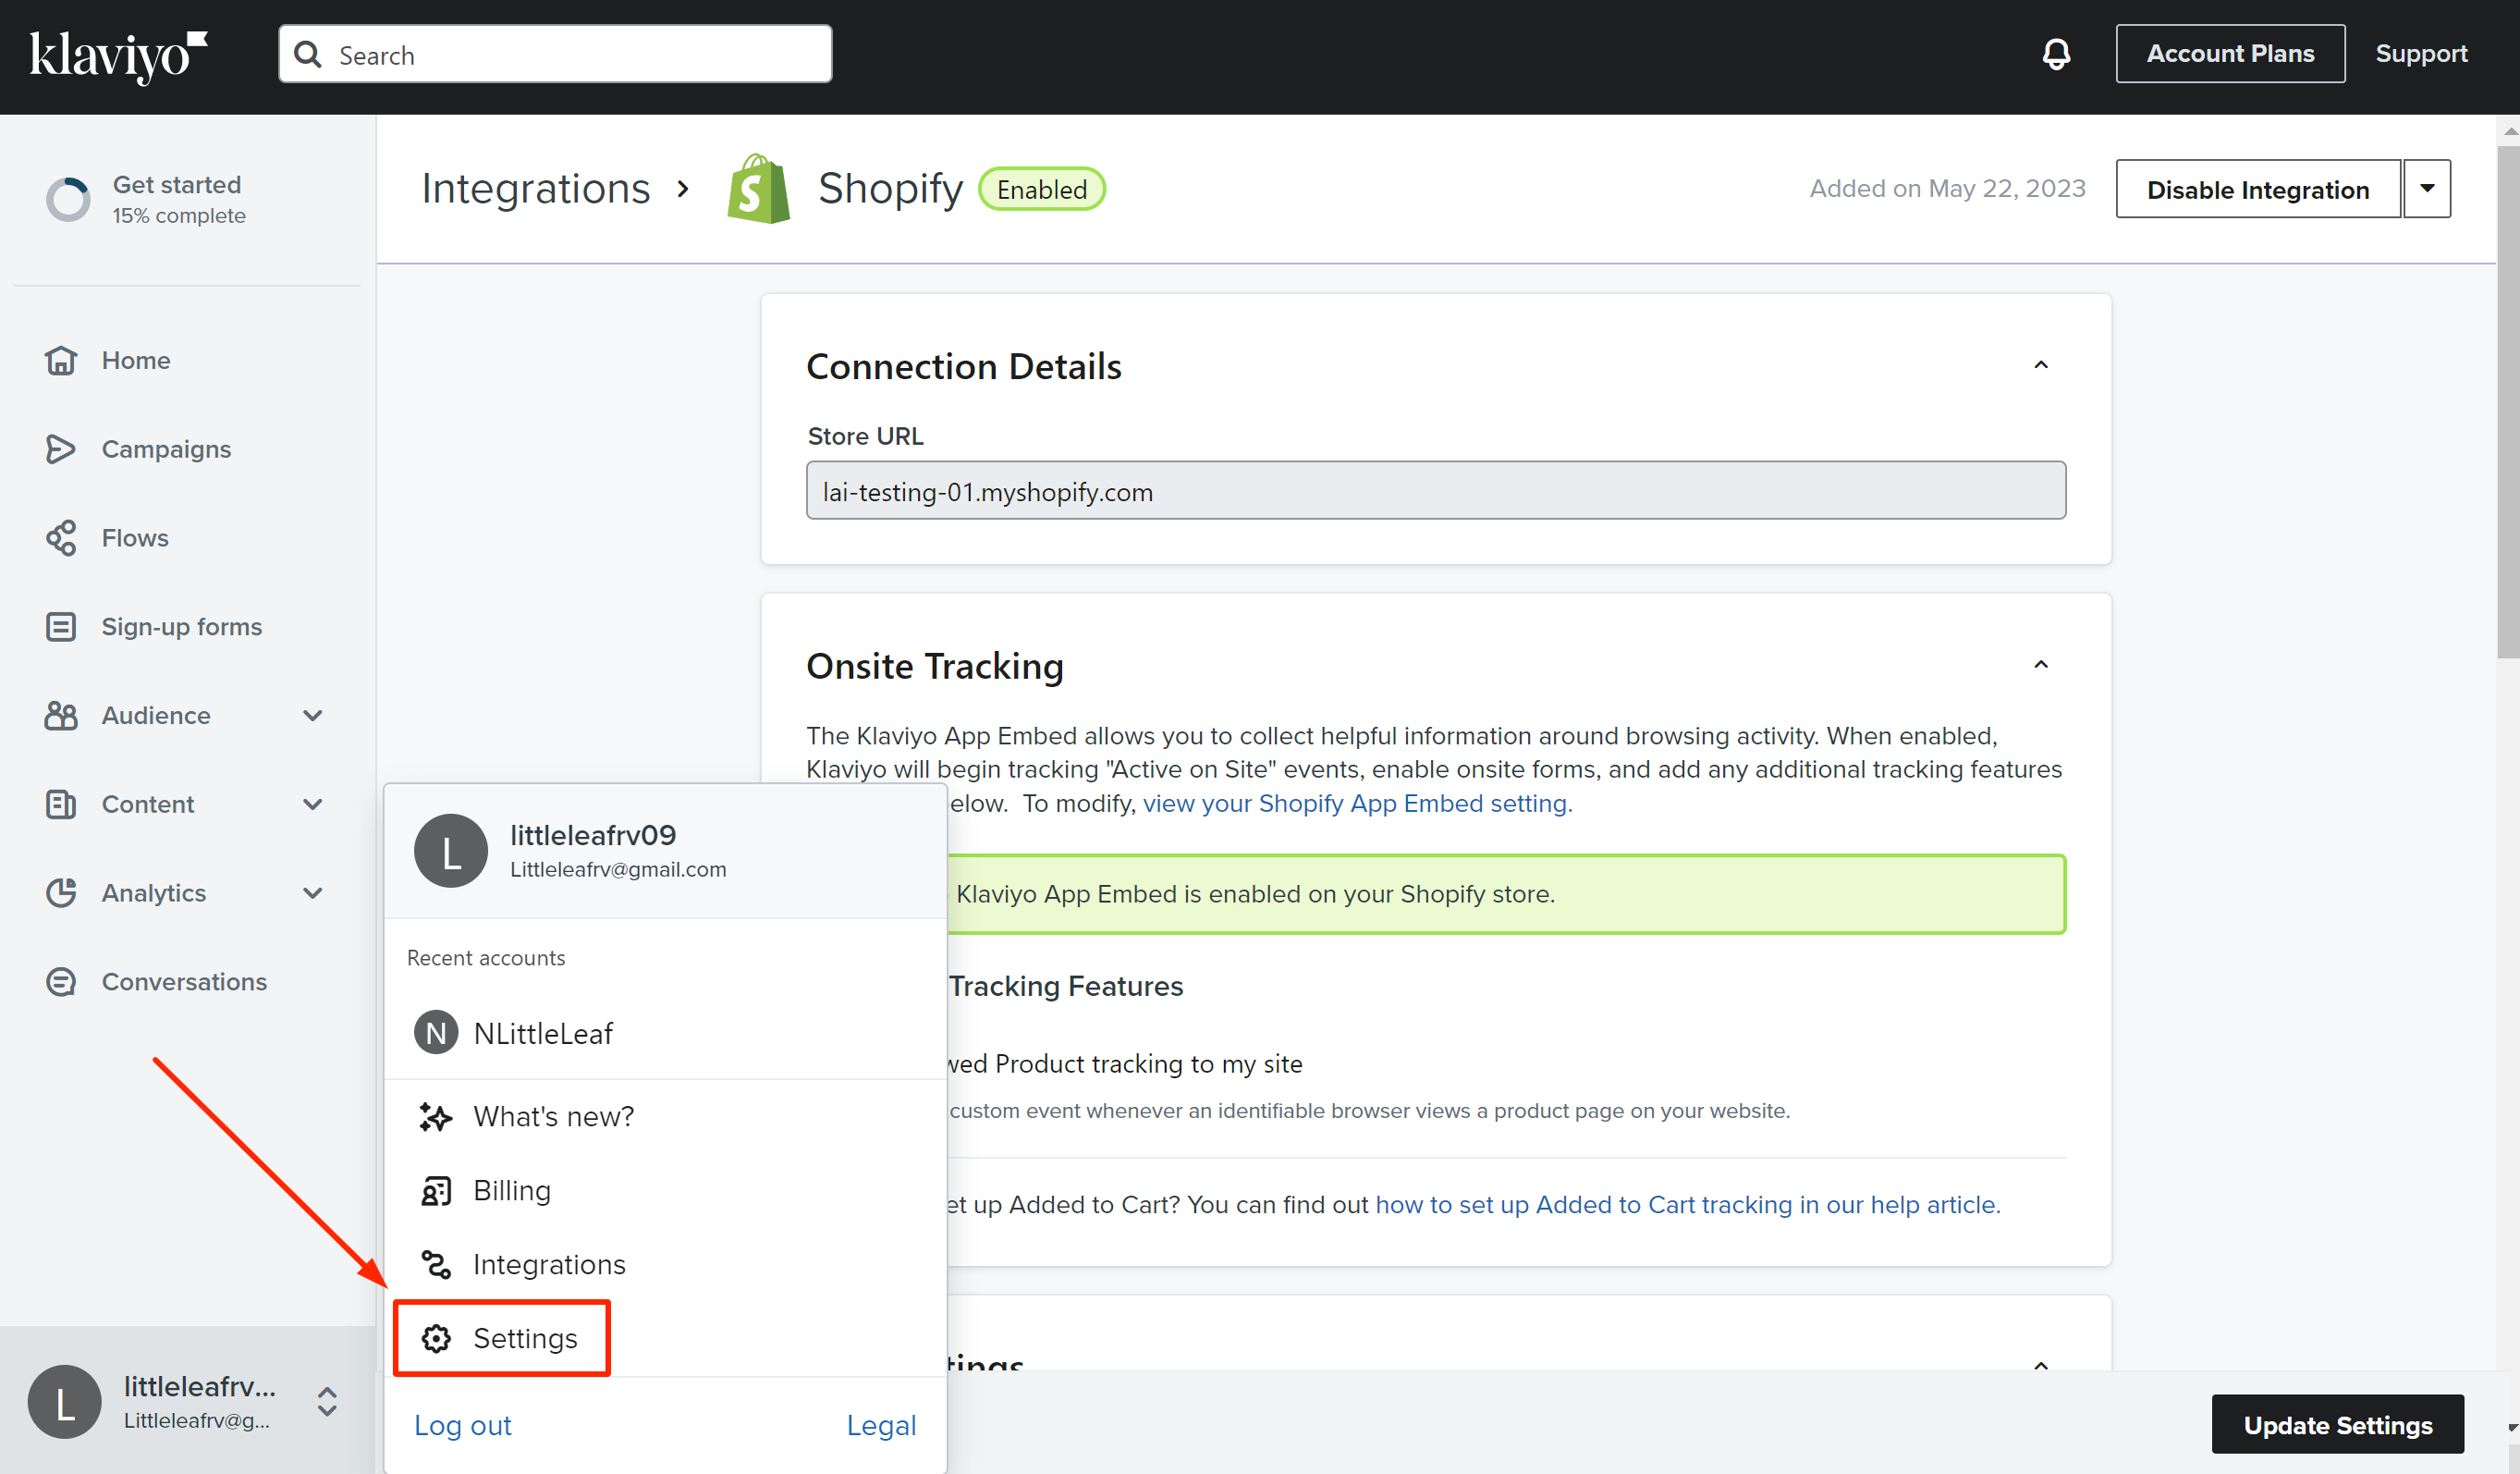
If there is no Private API Key available, please follow this link and create one Private API Key.
- Copy the API Key.
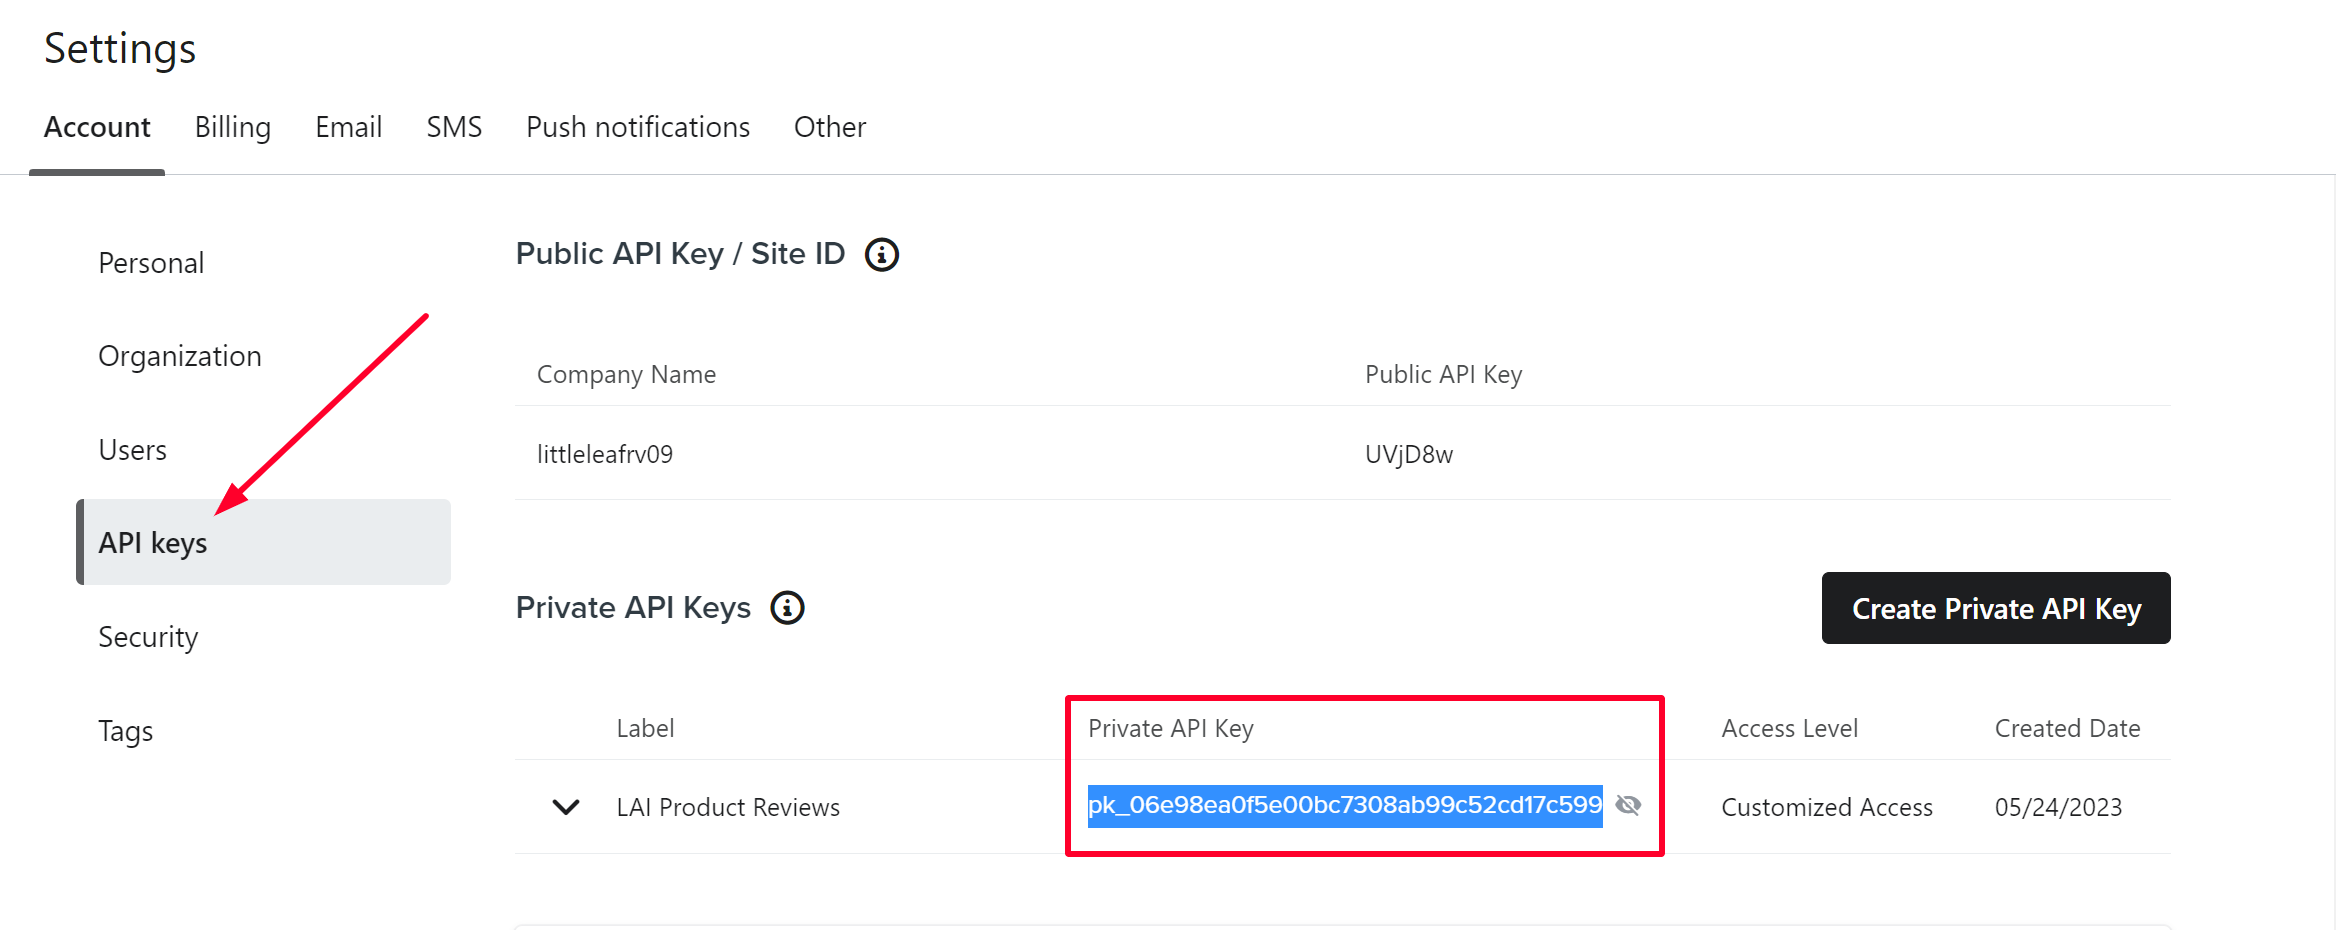
- Enter the copied API Key here > click on Verify:
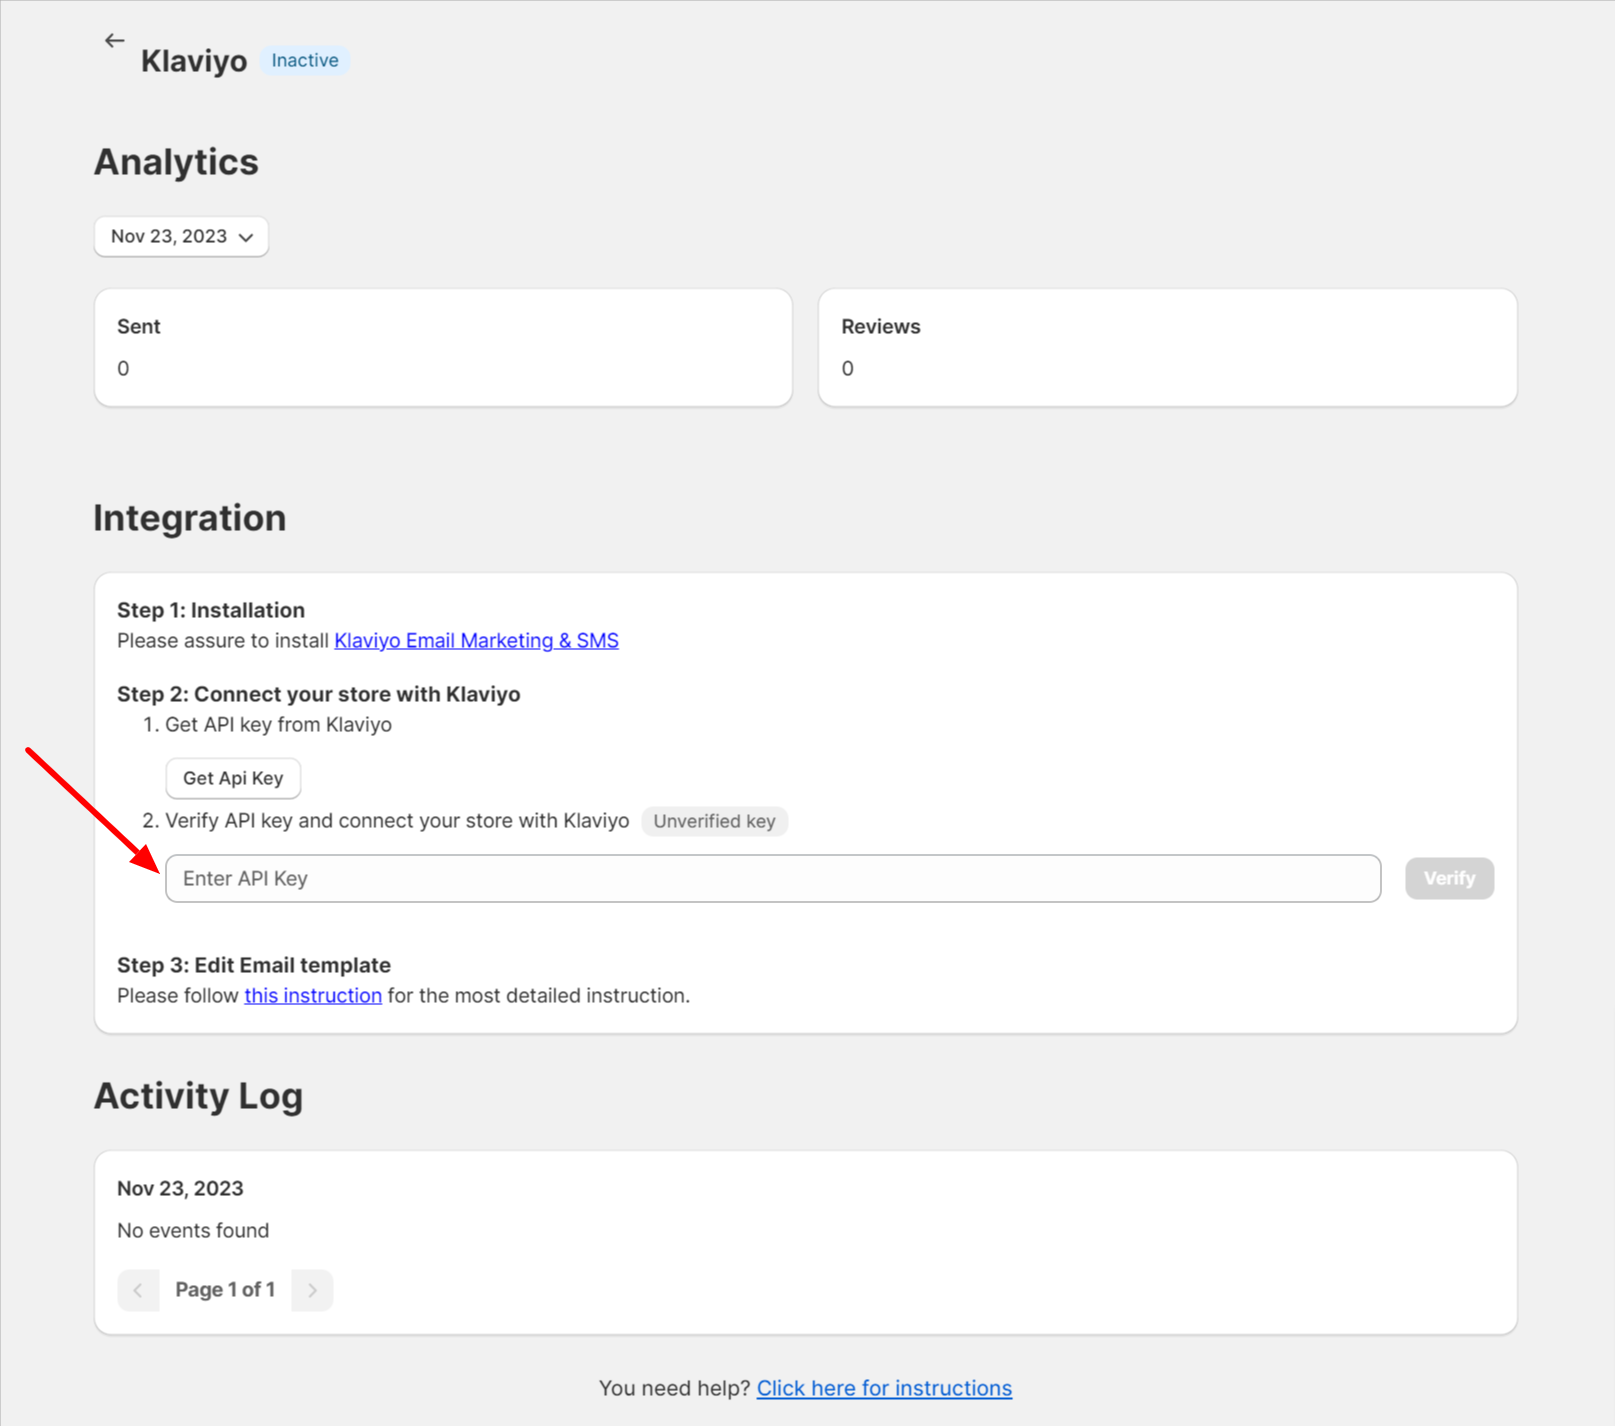
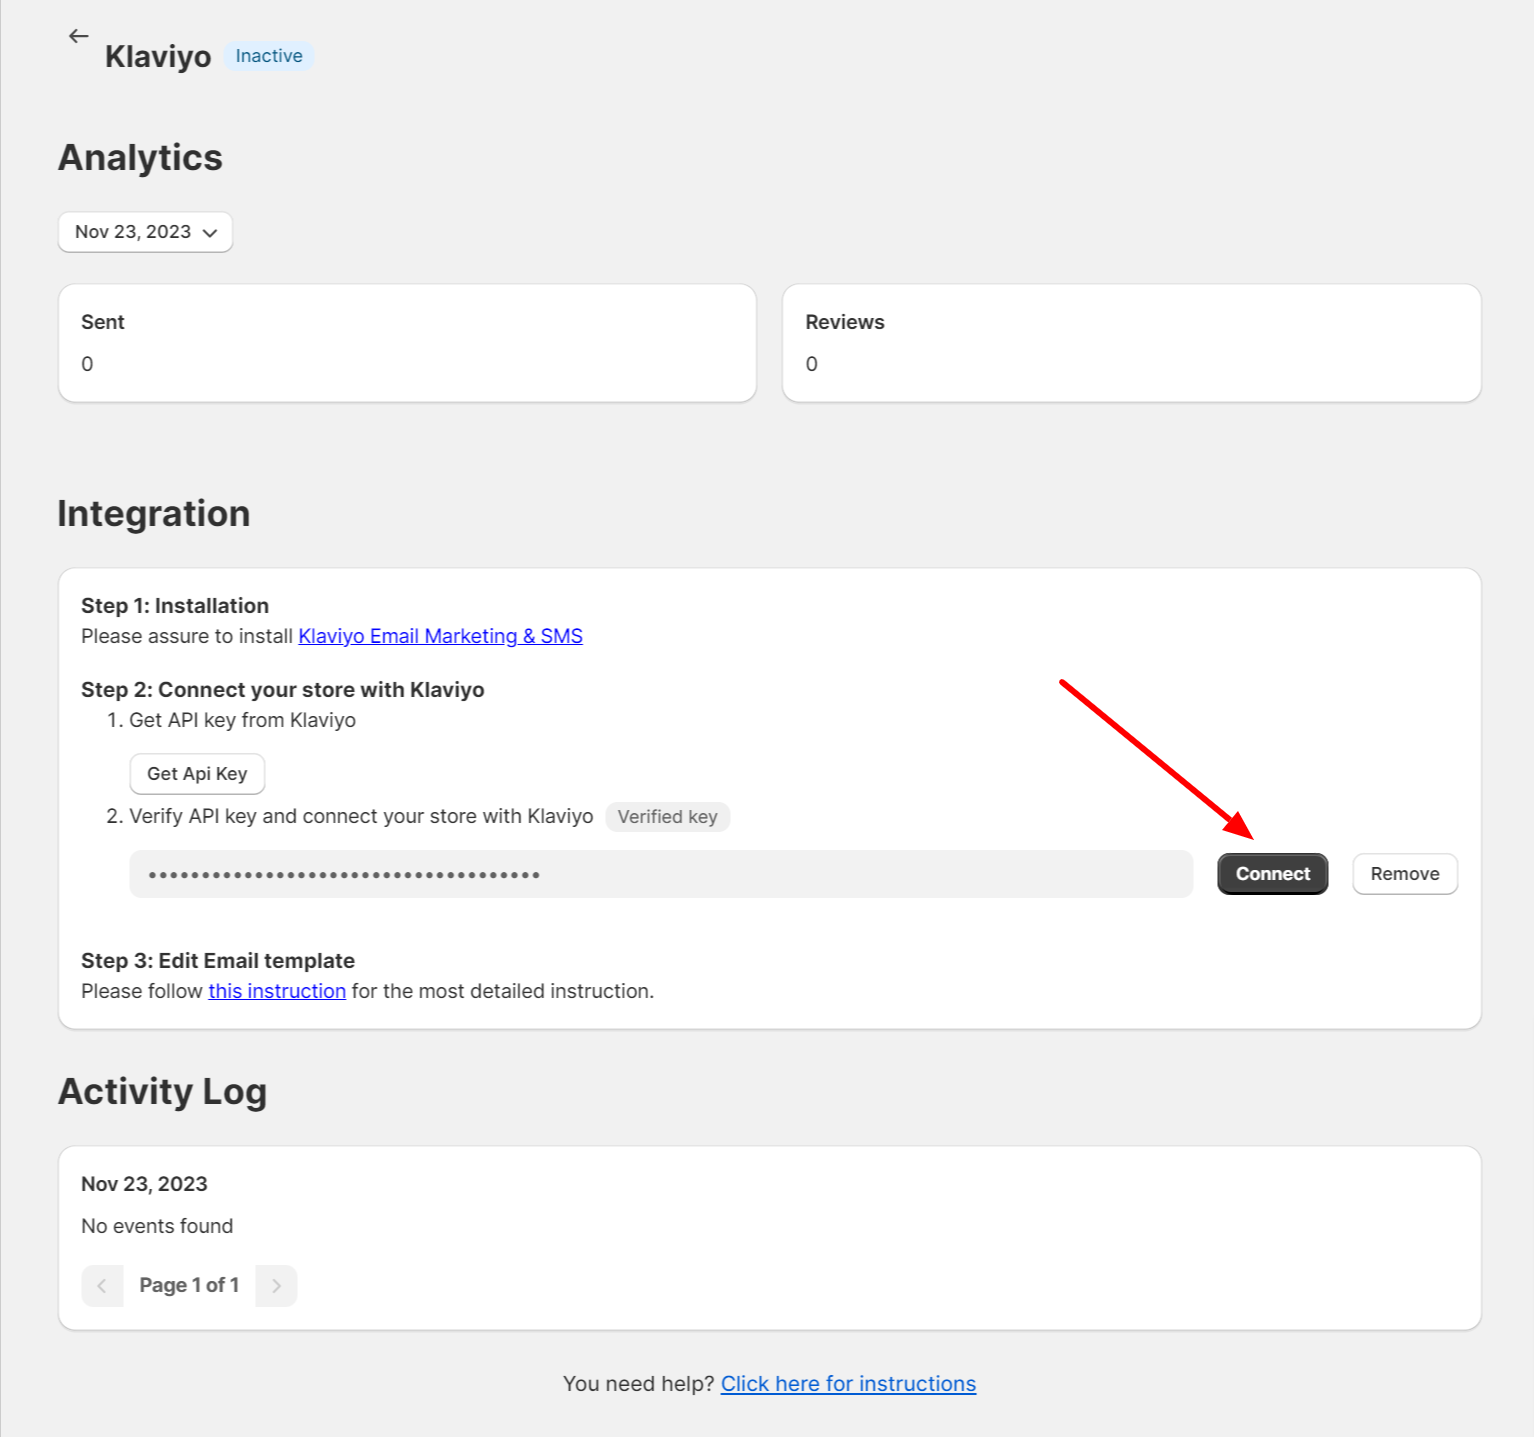
Step 3: Connection
- Please click on Connect button.
-
Afterwards, the integration is complete and three LAI metrics will show in Klaviyo app:
LAI fulfilled orders: Automatic emails will be sent after orders are fulfilled.
LAI paid orders: Automatic emails will be sent after orders are paid.
LAI reviews are submitted.: When a review is submitted in LAI Product Reviews, an event will be sent to Klaviyo to implement the flow created in Klaviyo.
Send emails and use Klaviyo templates
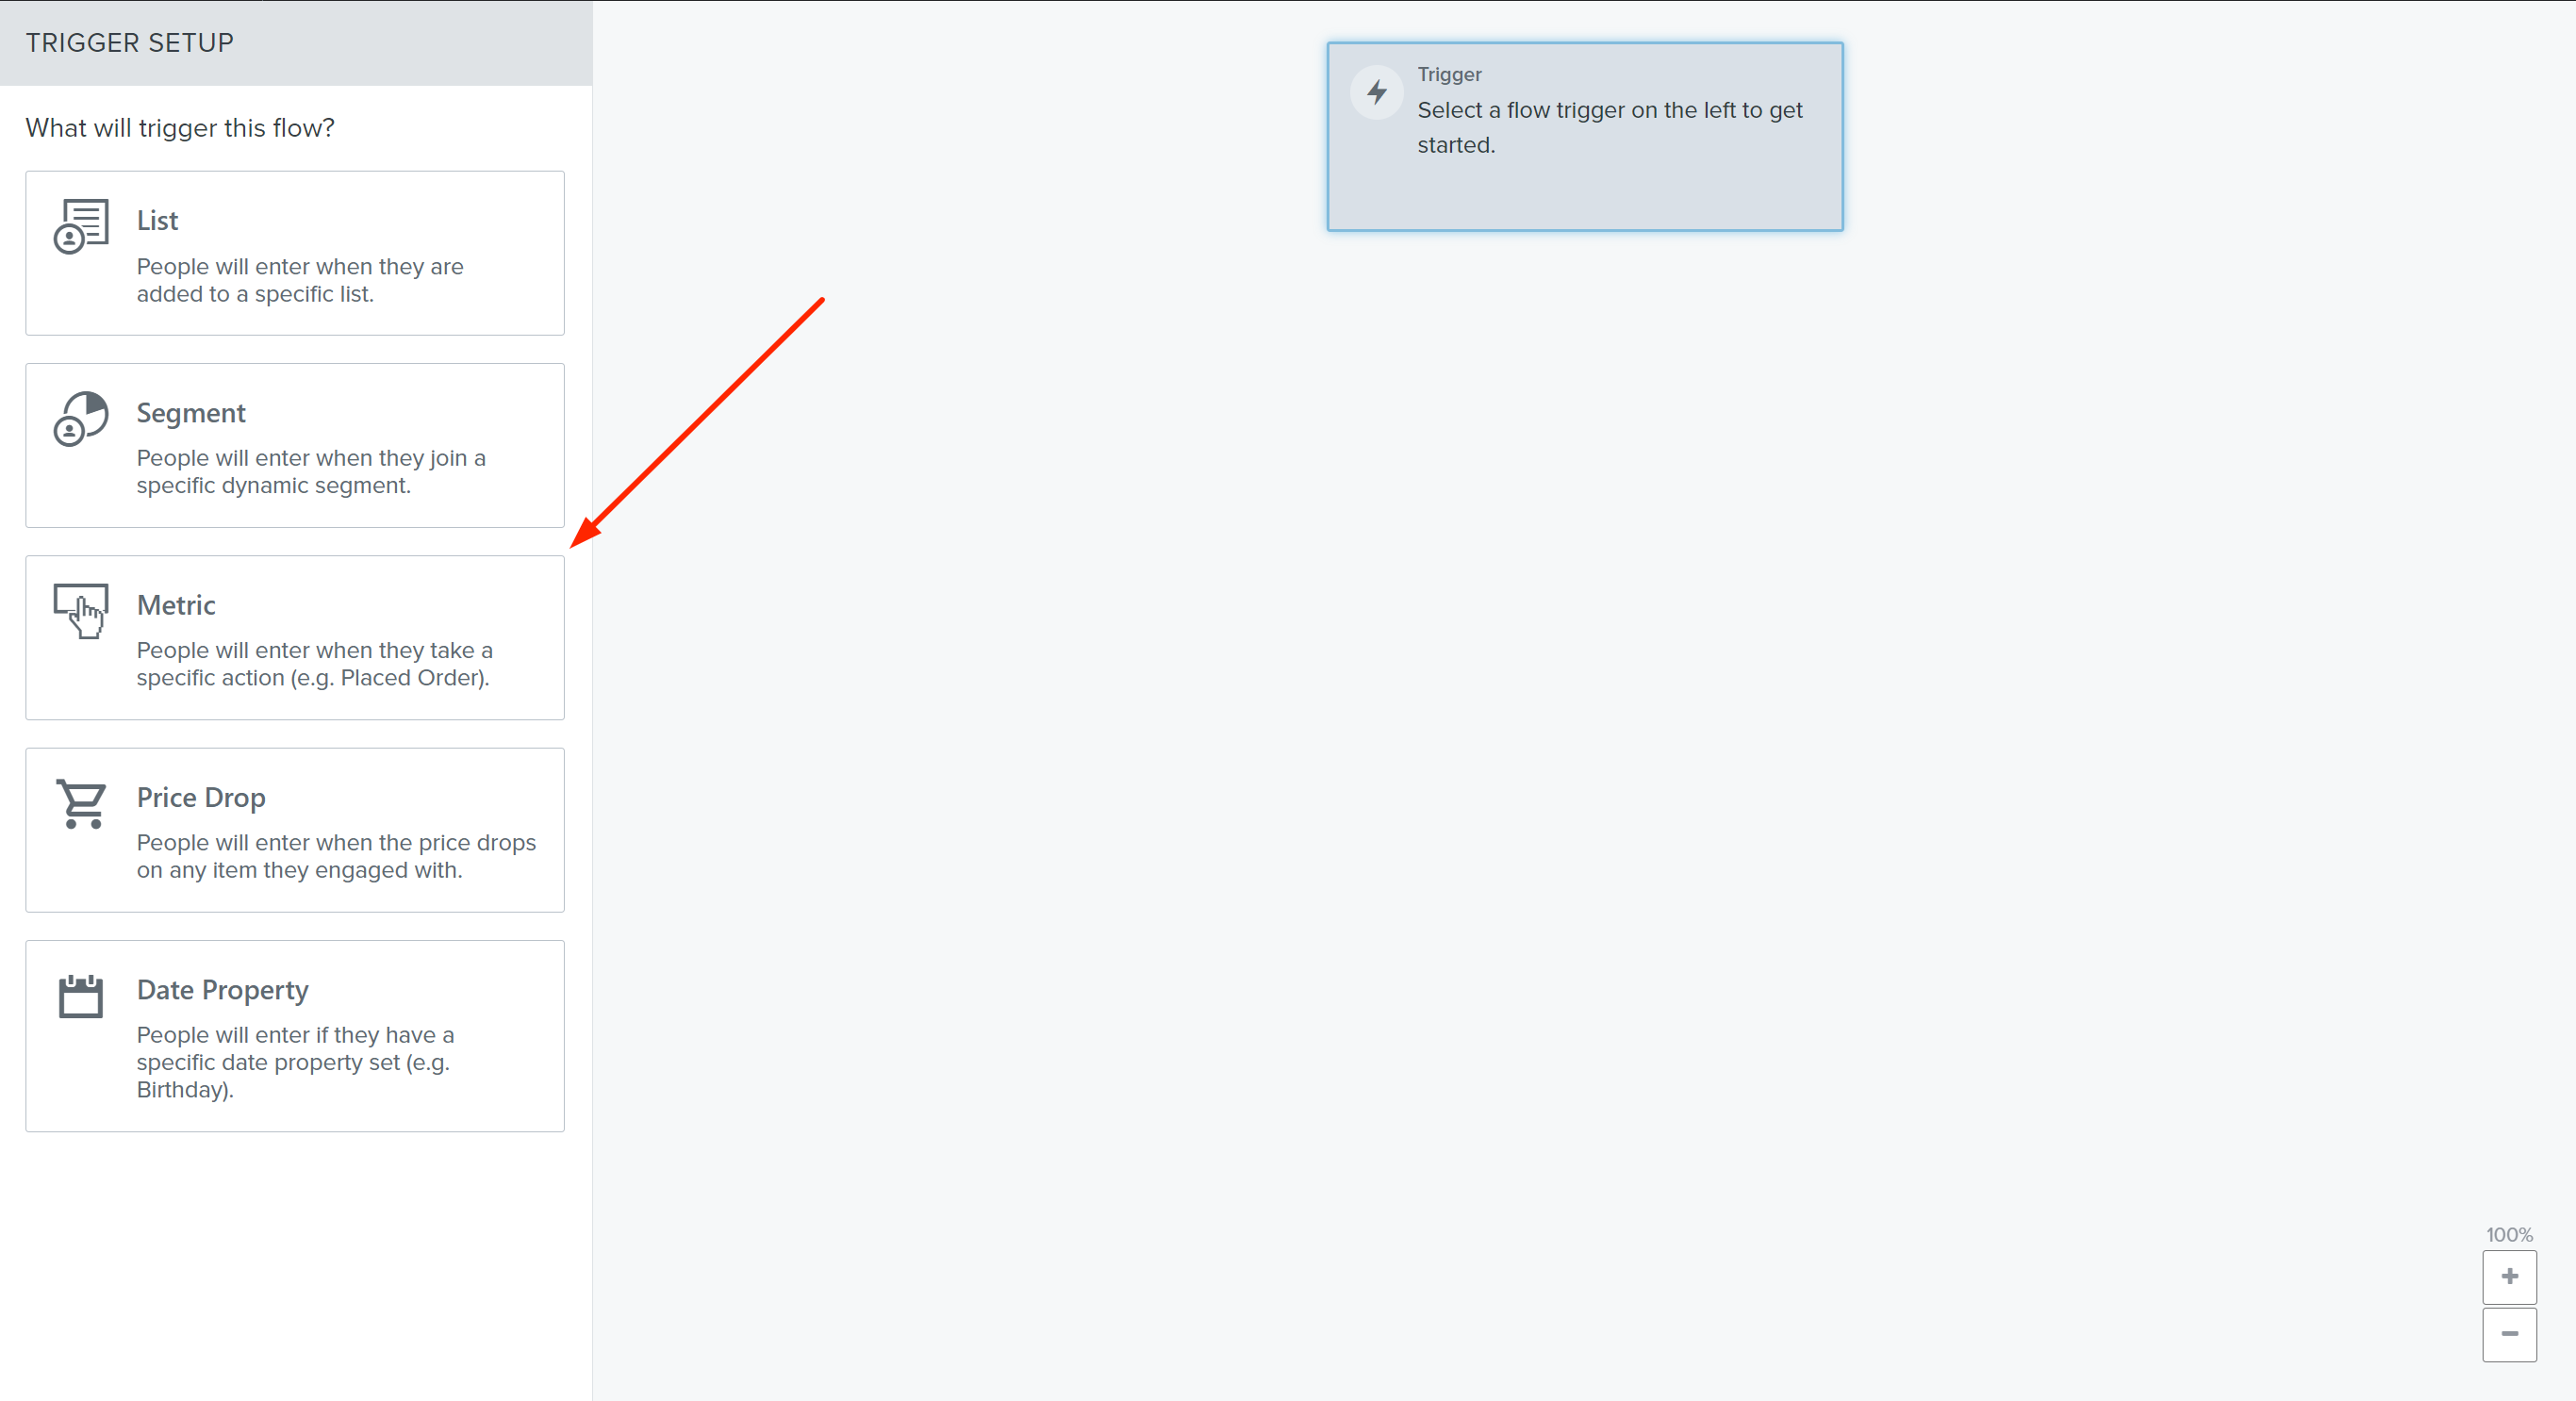
- Please visit Klaviyo admin site > select Flows > click on Create flow or you can click here > click on Create from scratch > name the flow.
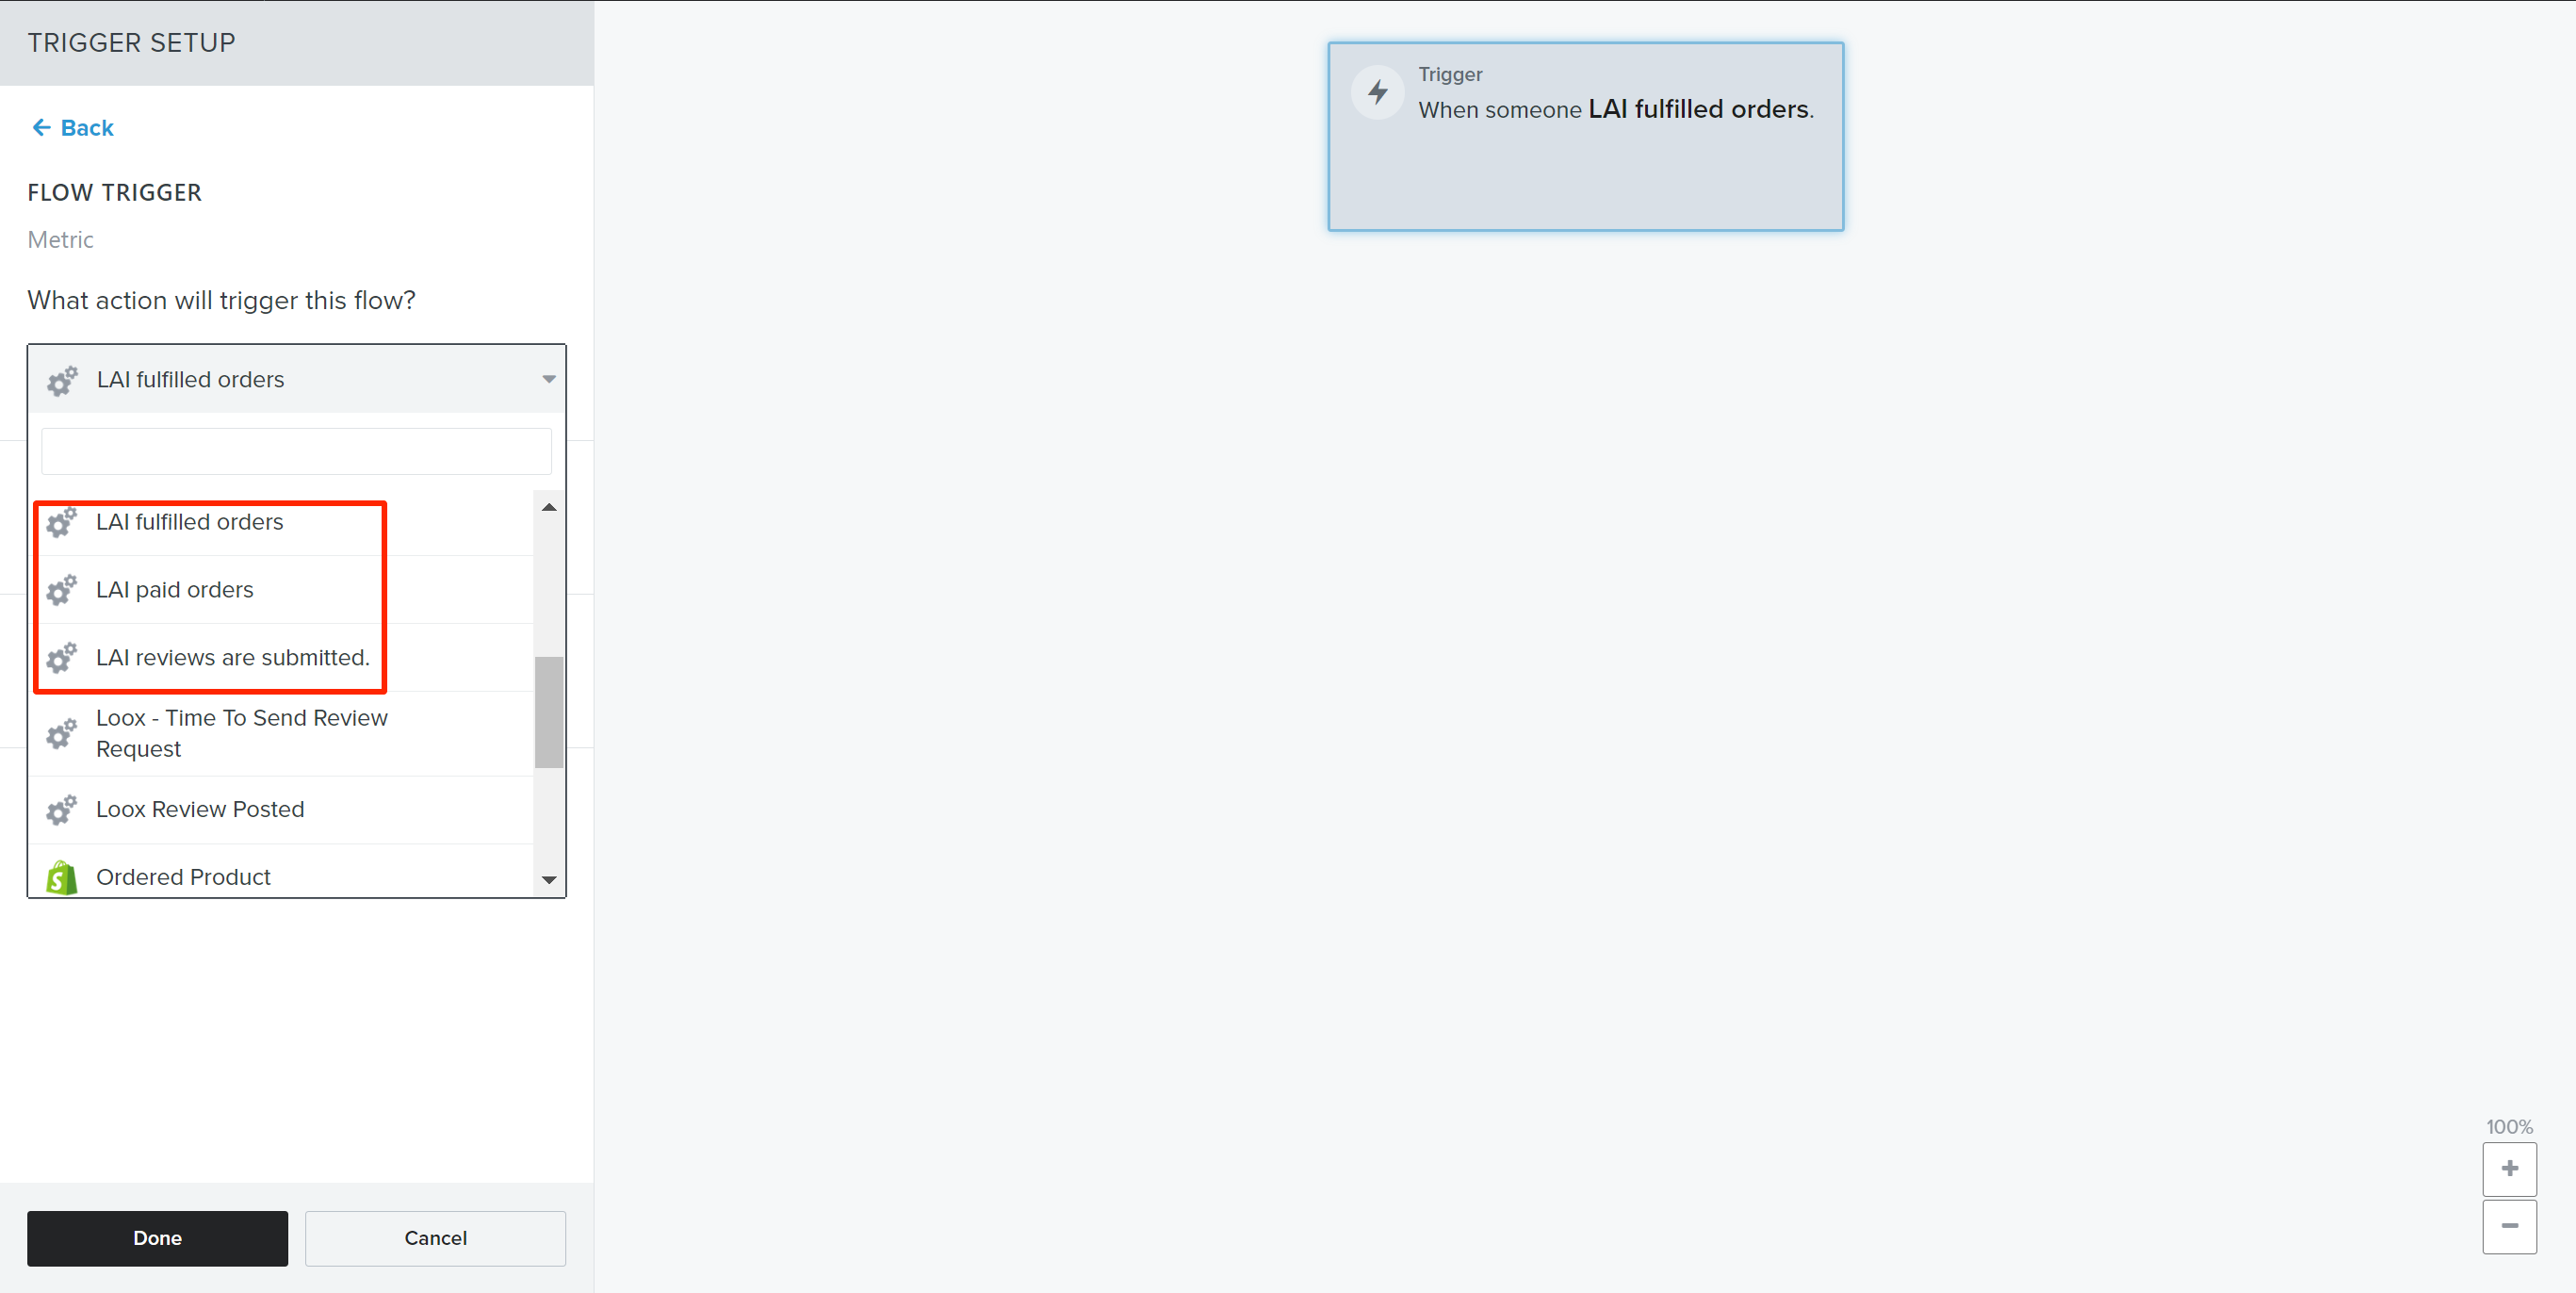
Step 1: Choose LAI metrics
- On the left menu, select Metric > choose 1 LAI metric > click on Done.
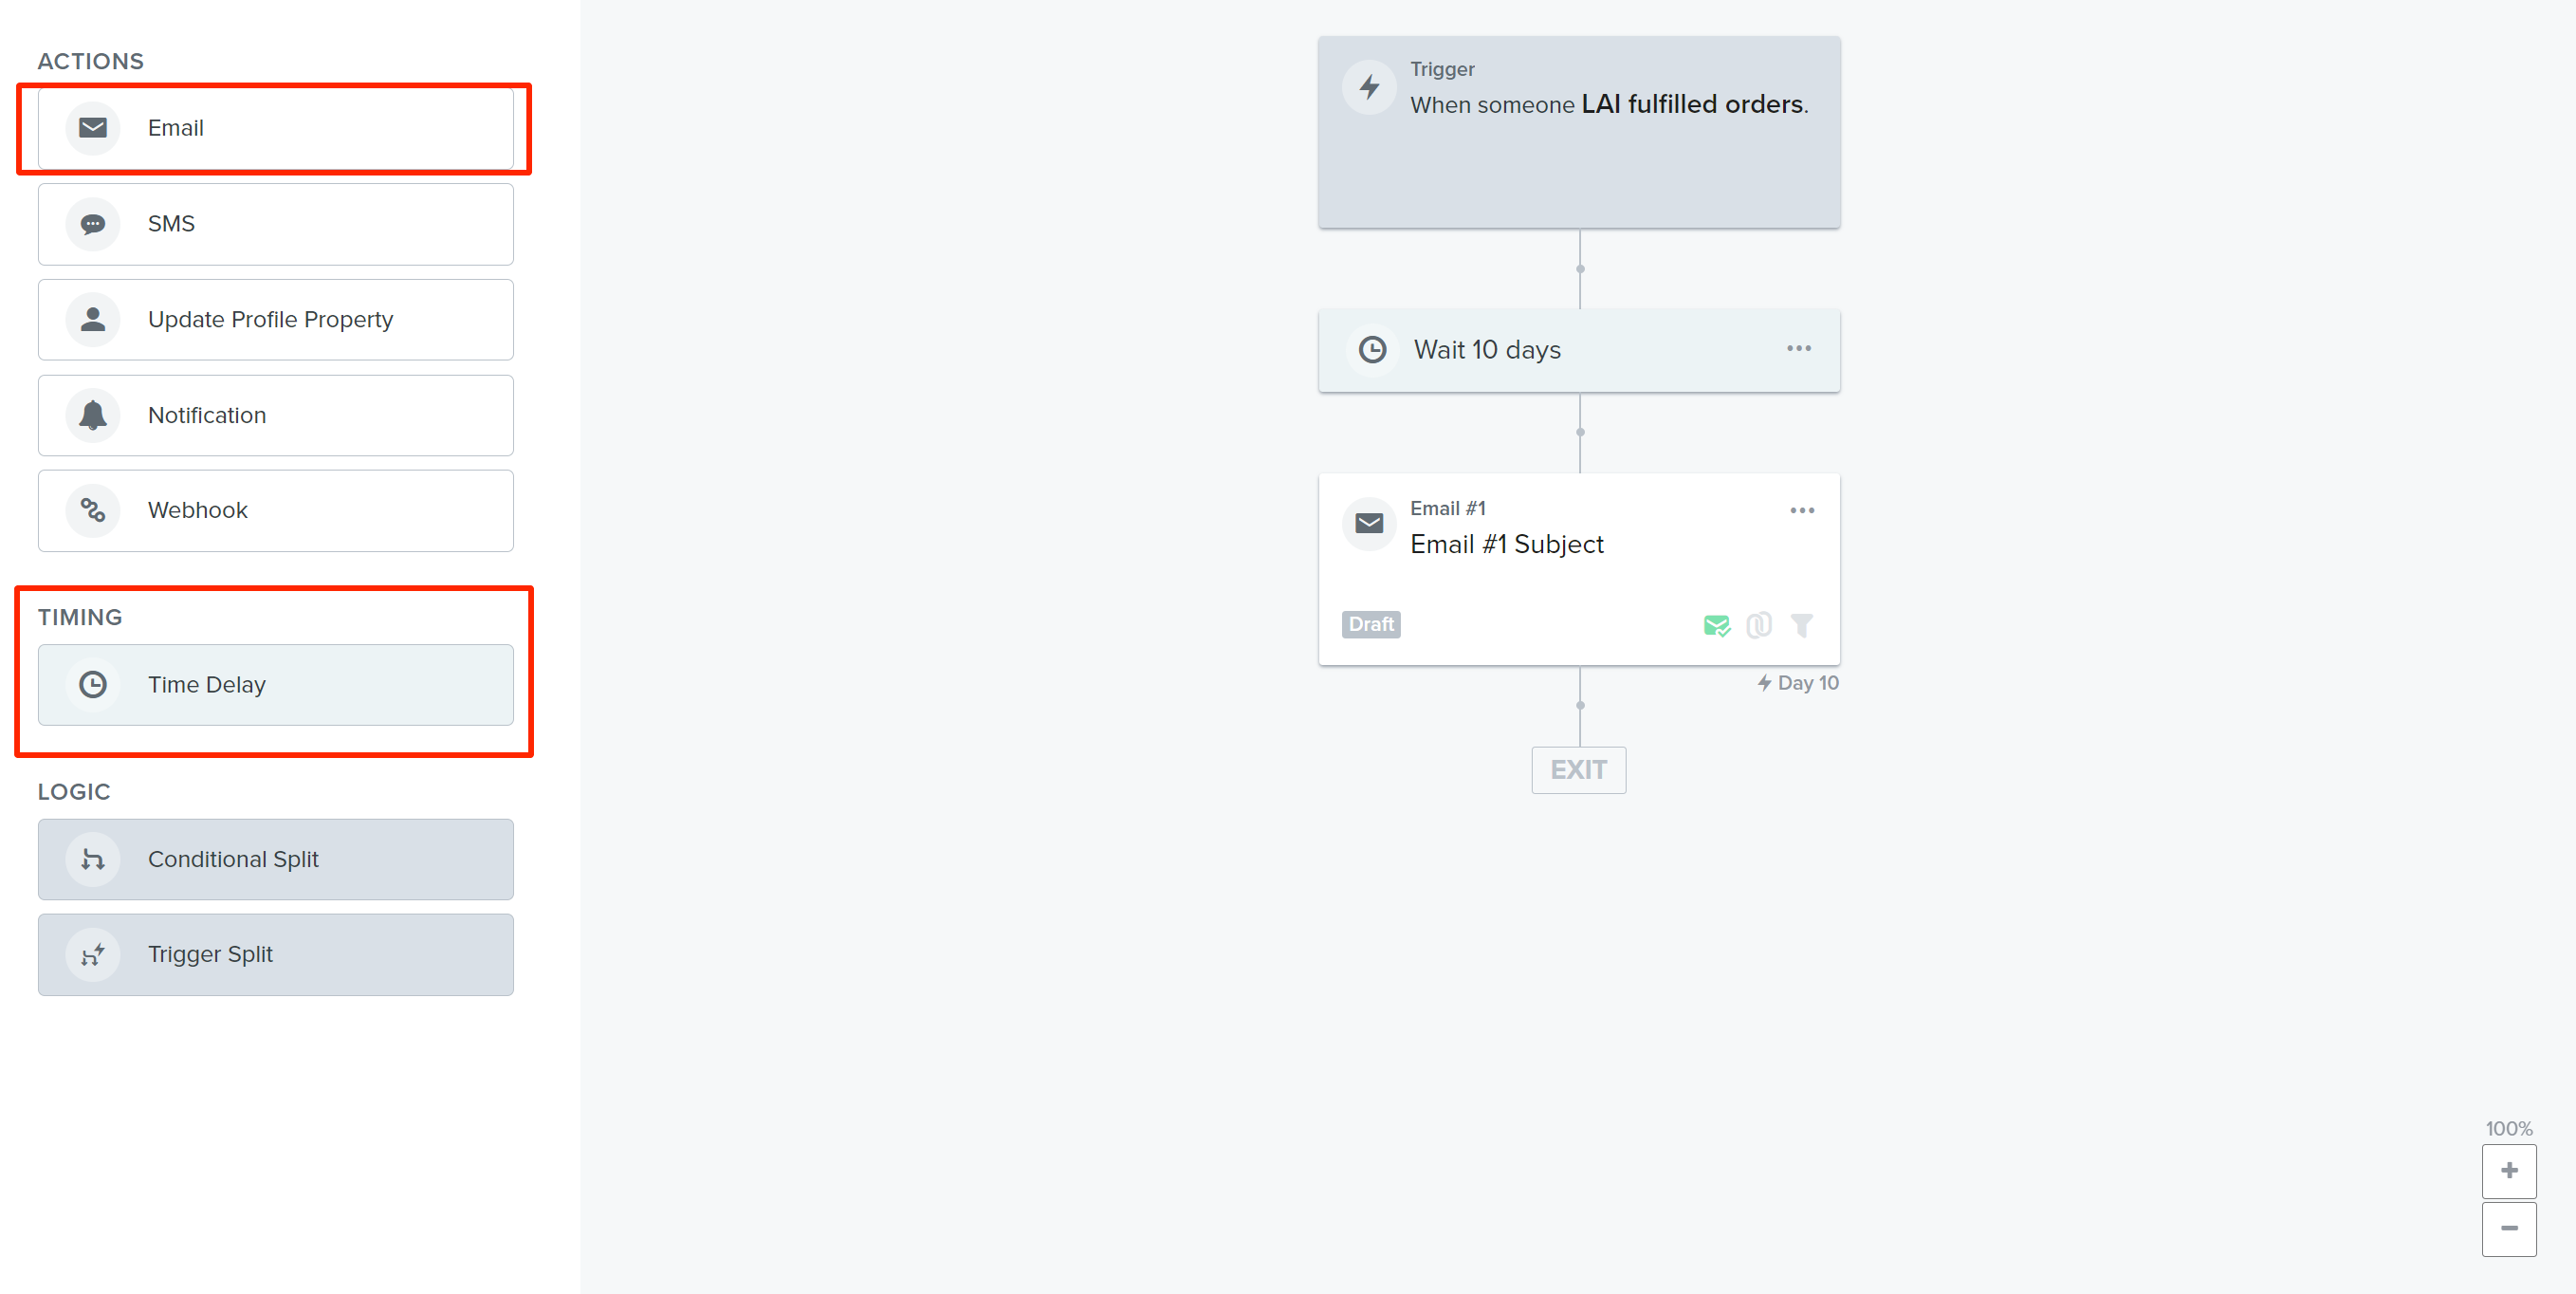
Step 2: Complete the flow
- Select Time Delay (You can set that after n days after orders are fulfilled/paid or reviews are submitted, emails will be sent.) and Email to complete the flow.
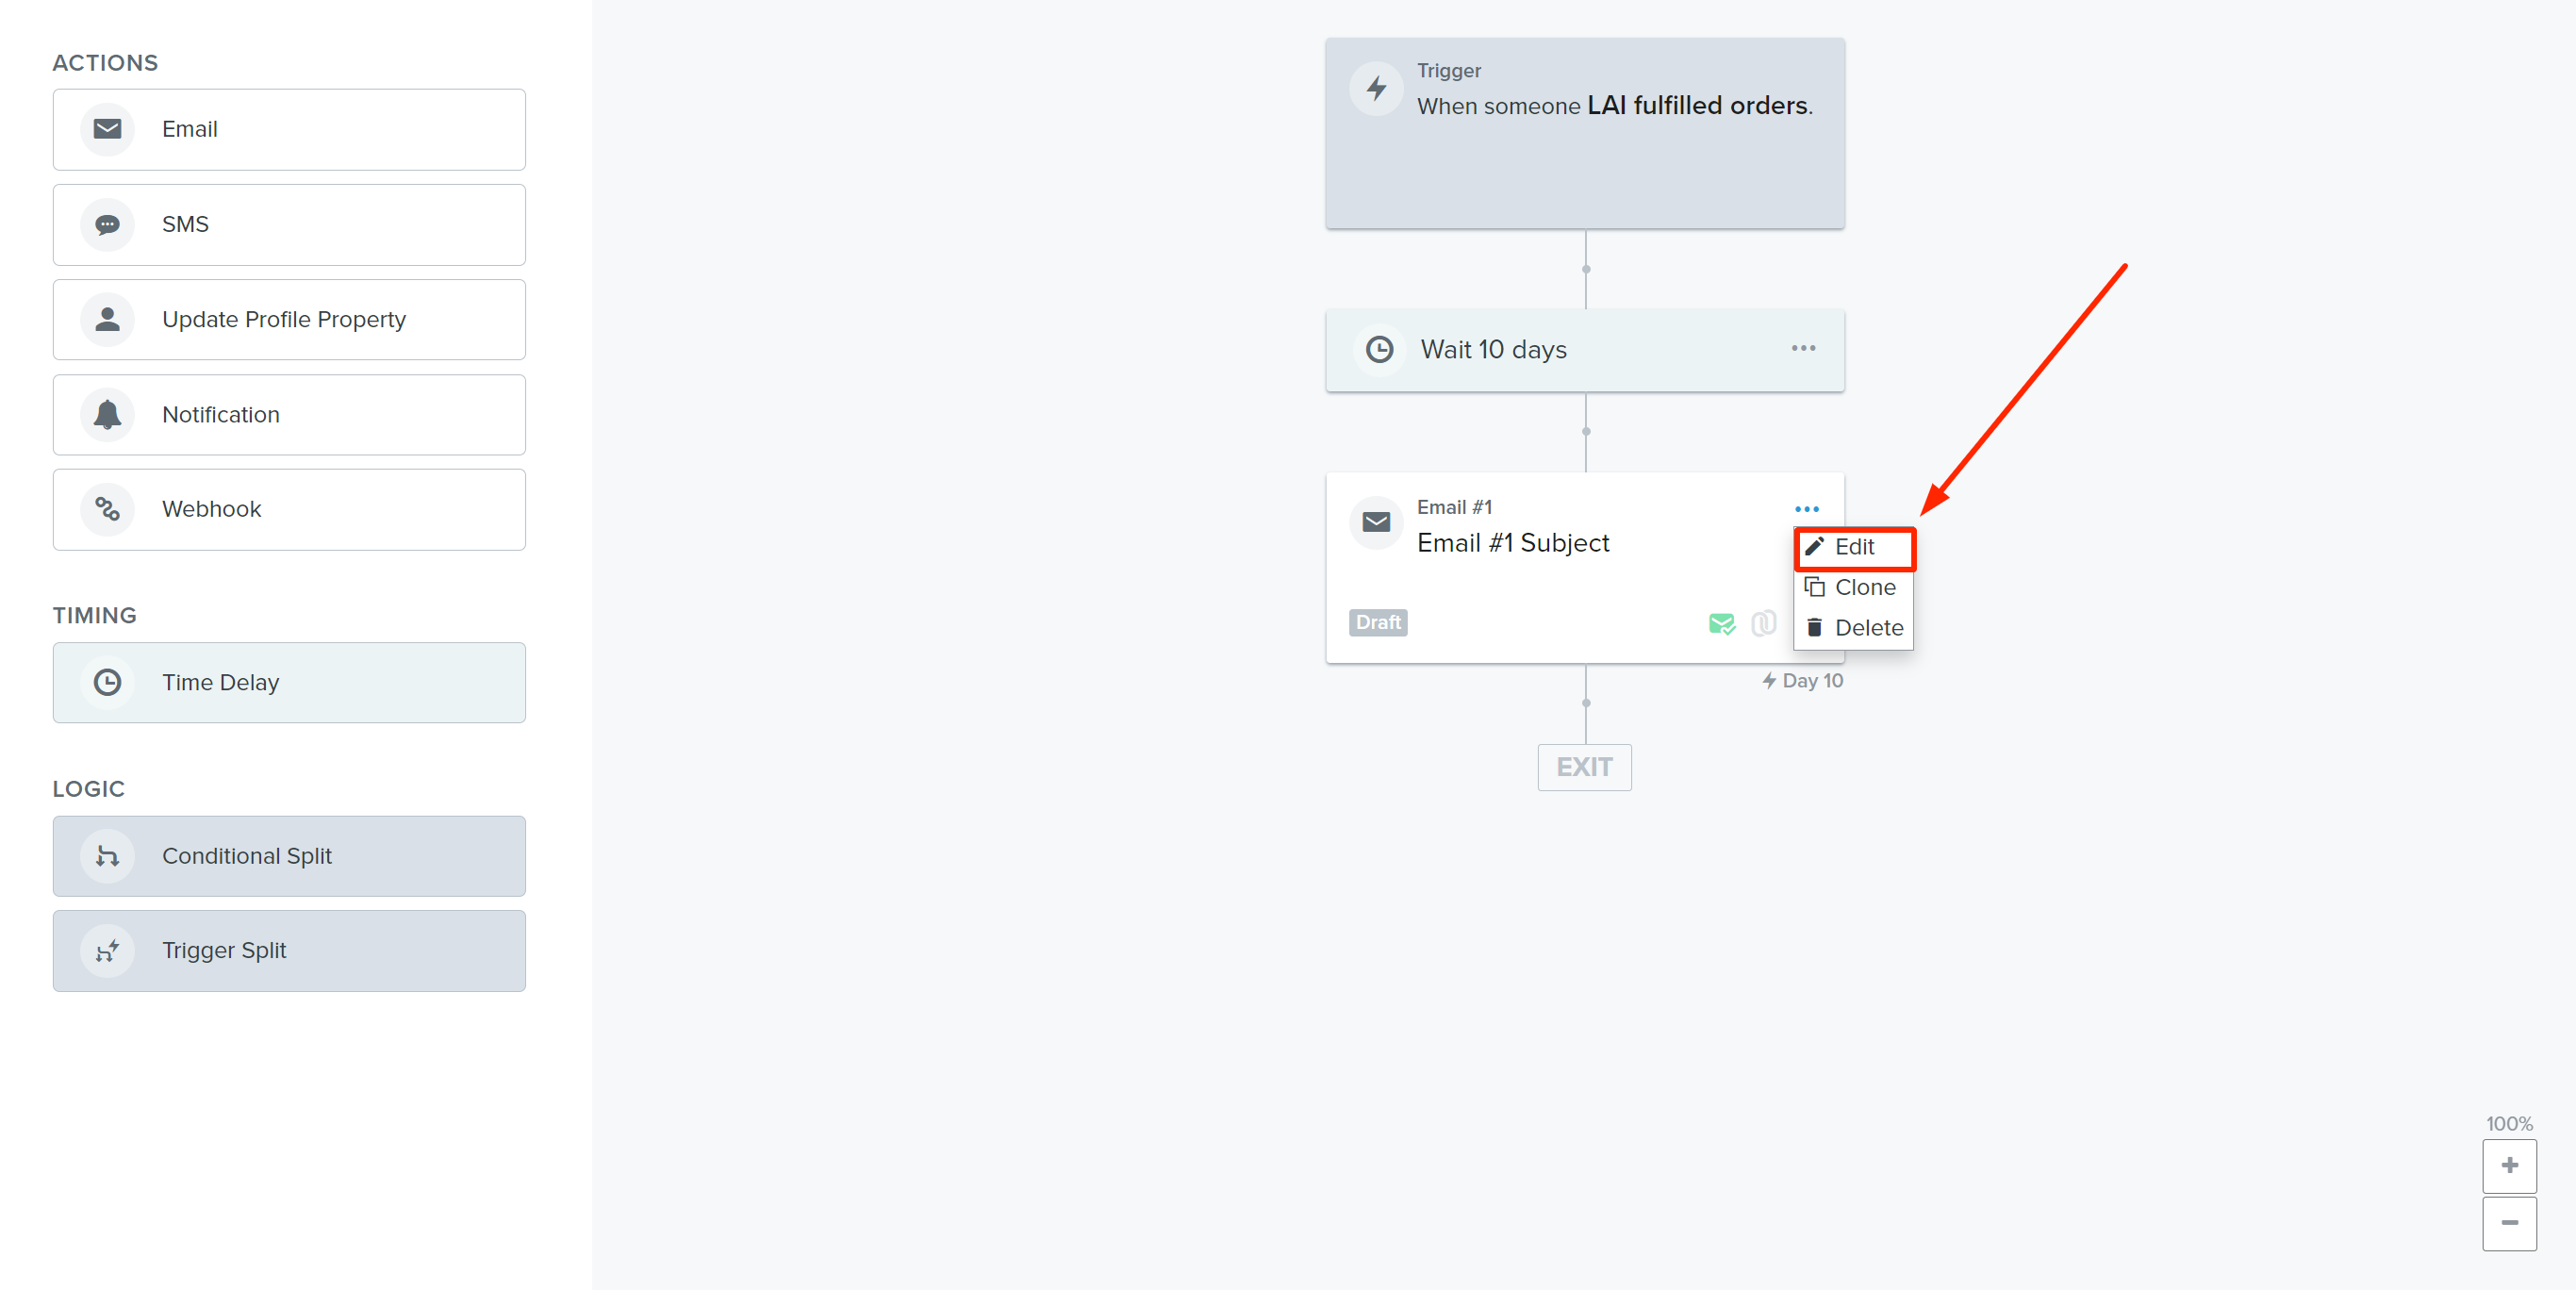
Step 3: Edit the template
- Click on Edit and start customizing the email content:
-
Choose a template provided by Klaviyo.
-
This is a variable list that you can use to mention your customers in emails:
{{ event.products.0.shop_name|default:'' }}: to show your shop name
{{ event.products.0.email|default:'' }}: to show your customers' emails
{{ event.products.0.first_name|default:'' }}: to show your customers' first names
{{ event.products.0.last_name|default:'' }}: to show your customers' last names
{{ event.products.0.full_name|default:'' }}: to show your customers' full names
-
This is a sample to use these variables:
-
Setting: Hello {{ event.products.0.full_name|default:'' }}, hope you have a nice day. {{ event.products.0.shop_name|default:'' }} is waiting for your feedback of the recent order. Could you please spare just 1 minute to share your thought? We truly appreciate your help!
-
Reality: Hello James Harry, hope you have a nice day. Nlittleleaf is waiting for your feedback of the recent order. Could you please spare just 1 minute to share your thought? We truly appreciate your help!
-
{{ event.products.0.full_name|default:'' }} means James Harry.
-
{{ event.products.0.shop_name|default:'' }} means Nlittleleaf.
-
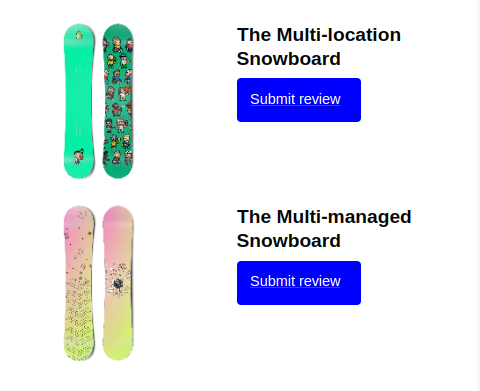
How to show the list of products available in your orders
-
Please add the Two-column table block to your template.
The right-hand column contains product titles and Submit review button.
The left-hand column contains product images.
-
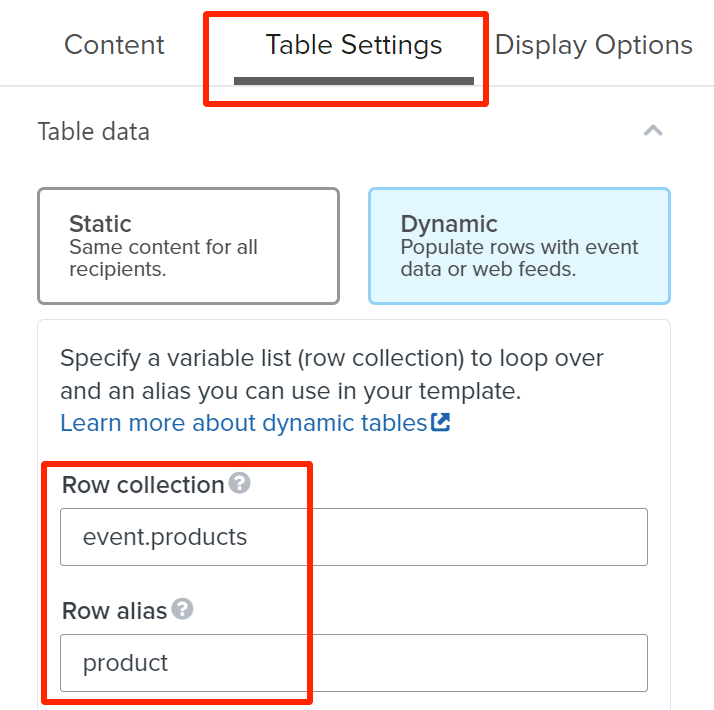
Set up the Table Settings:
Table Data: Dynamic
Row collection: event.products
Row alias: product
-
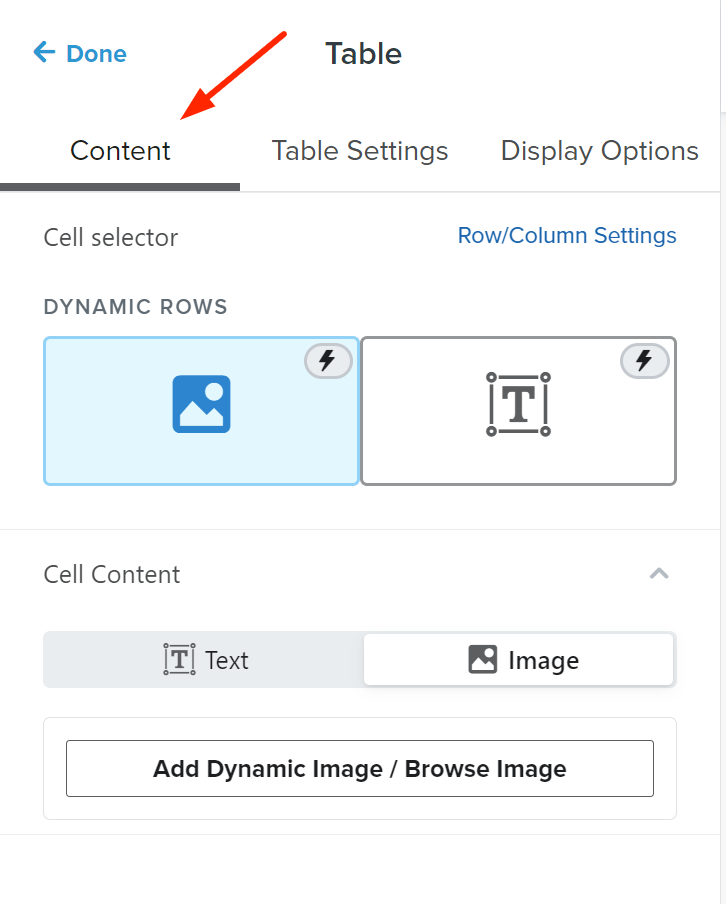
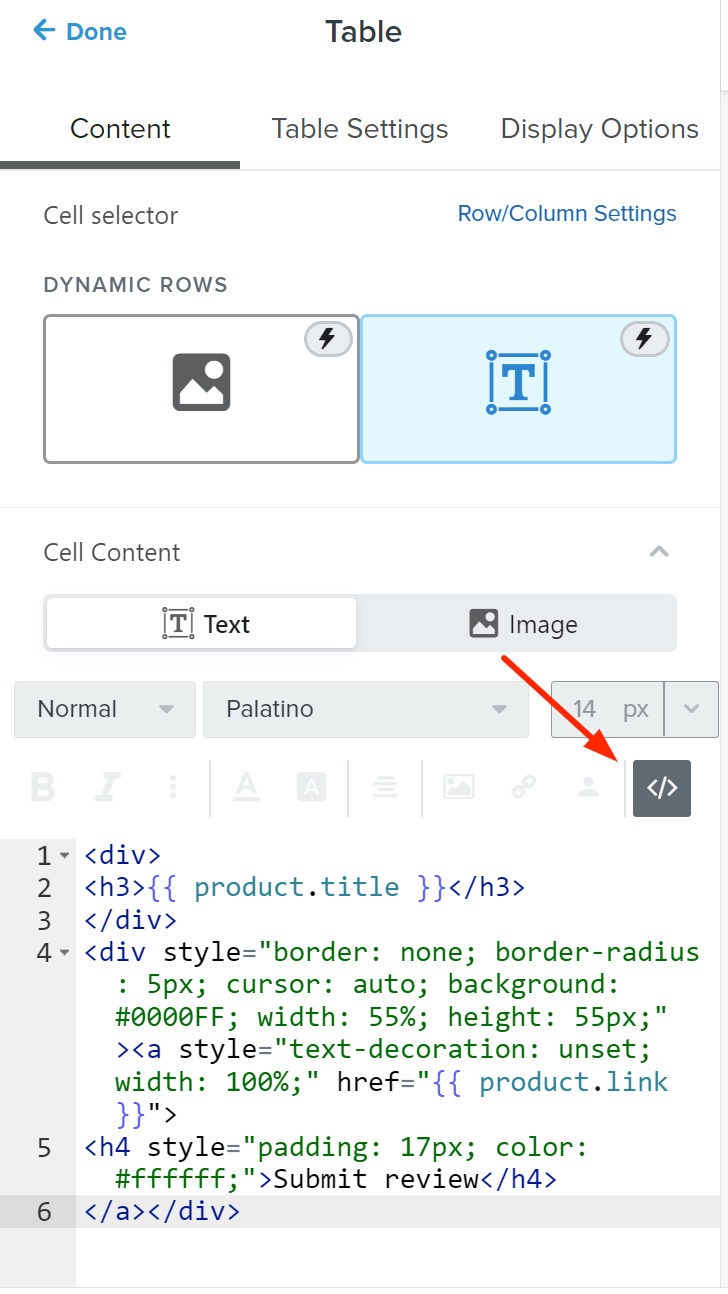
Set up the Content:
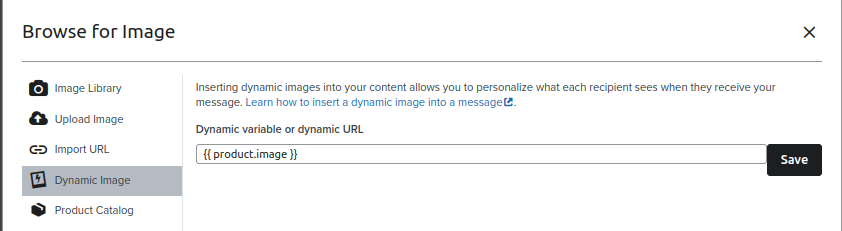
- In the left-hand column, please choose Image > click on Add Dynamic Image/Browse Image > enter {{ product.image }}
- In the right-hand column, select Source code > add this piece of code > click on Done:
<div style="margin-left: 20px;">
  <h3 style="font-size: 16px; -webkit-line-clamp: 3; -webkit-box-orient: vertical; display: -webkit-box; overflow: hidden;">{{ product.title }}</h3>
</div>
<div style="border: none; border-radius: 5px; margin-left: 20px; cursor: auto; background: #0000FF; width: 50%; height: 40px;"><a style="text-decoration: unset; width: 100%;" href="{{ product.link }}">
  <p style="font-size: 16px; line-height: 40px; color: #ffffff; text-align: center;">Submit review</p>
</a></div>
- This is how the email displays when it is sent to your customer:
Disconnect LAI Product Reviews from Klaviyo
- To stop sending events and emails by Klaviyo, please click on Remove or Disconnect.
If you need any other help, please contact our support team via live chat or send emails to support@smartifyapps.com.